Never opened Final Cut Pro X before, or just want to review the default interface from top to bottom? This is the video for you! In this video tutorial, we’ll brief you on the basic names and functions of every area in the interface.
Part 1: Library Sidebar
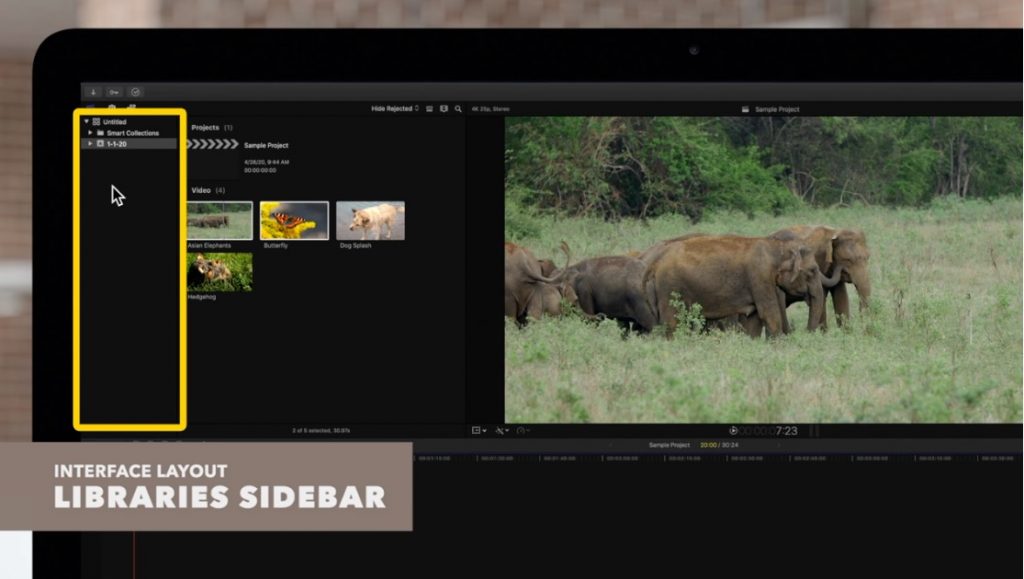
On the left side of Final Cut Pro X you have access to all of your open Libraries by clicking the film clapperboard icon. Each library will have its own Projects and events contained within.
The Camera And Audio icon in the middle will give you access to photos and audio on your system.
The “T” icon to the right is the Titles and Generators where your built in templates and some installed plugins will be located.
Part 2: Media Browser
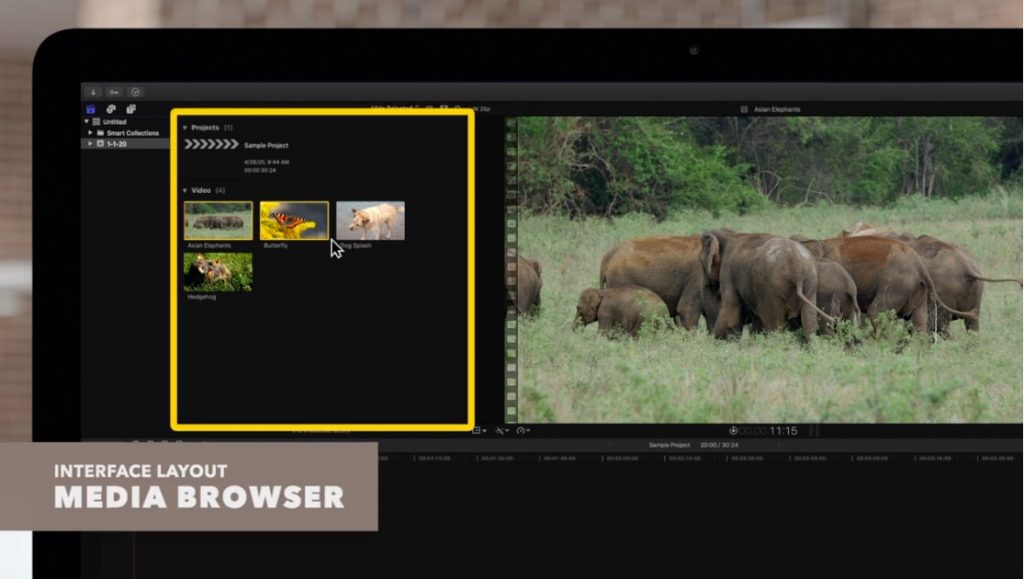
In the media browser you can navigate between other projects within your library as well as the imported footage. You can also view each Title or Generator individually if you have the Titles and Generators icon selected.
Part 3: Project & Clip Viewer

In the project viewer you will see a preview of the frame where the playhead is placed in the timeline. You can playback your project by pressing the spacebar or clicking the play icon directly below the viewer.
On the bottom left of the viewer there are three control menus. The left menu is the transform tools to warp or adjust your footage. The middle menu is the Enhancement tools. These can be used to enhance color or audio. The icon to the right that looks a speed gauge is the Re-time Tools. These adjustment tools can be used to speed up, slow down, reverse your footage and more.
Part 4: Properties Inspector
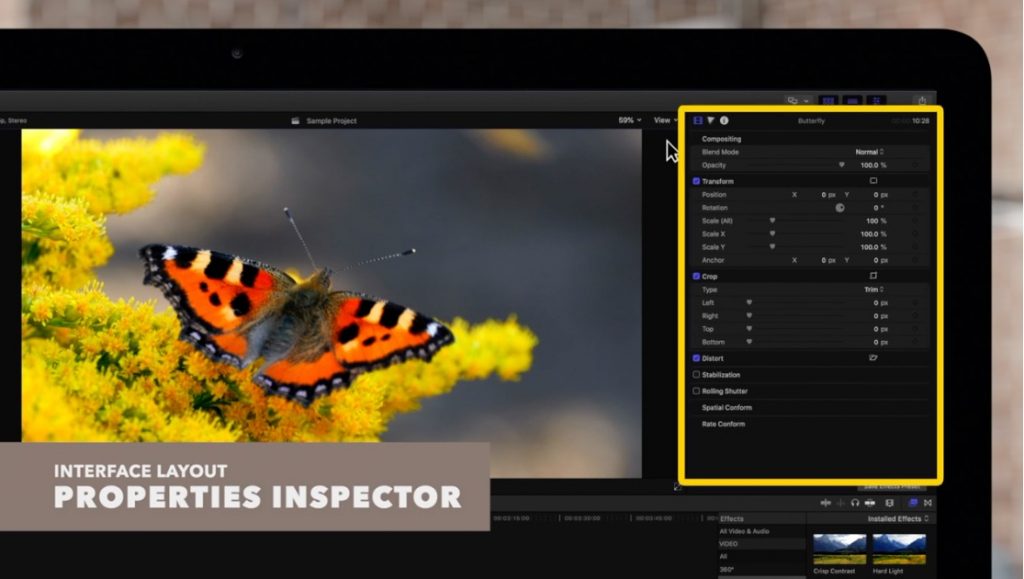
The inspector gives you access to control the various clip settings and parameters.
You can toggle the inspector on and off with Command 4.
Depending on what you have selected the first icon could be a Title, Generator, Transition, or Clip icon. If you have a Title, Generator, or Transition icon selected there will be controls for adjusting any published parameters within the preset.
In the clips inspector you can adjust more transform settings for the media and well as cropping and distortion tools. When you add an effect from your effect browser it will populate a controls panel in the clips inspector.
In the color icon you can adjust the color, saturation, and exposure of the clip. You can adjust the mast, shadows, midtones, and highlights to best color your clips.
The audio icon to the right will show the audio inspector. You can enhance your audio to fit the needs of your project. Audio effects can be added from the effects browser to further alter the audio.
The last icon located furthest right in the Inspector window is the Info Inspector. You can view any clip’s information such as the resolution, frame rate, audio type, and more.
Part 5: Project Timeline
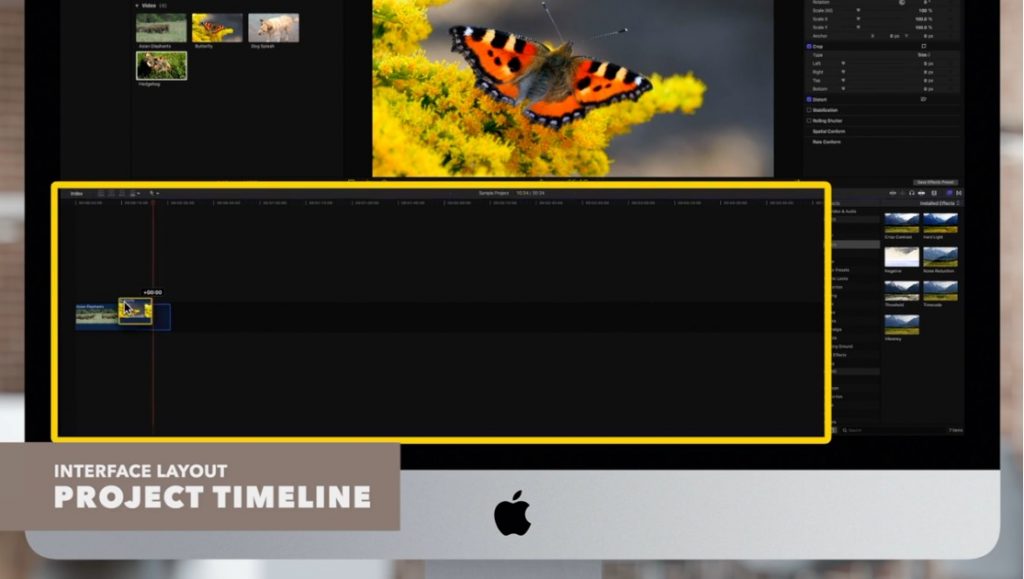
The project timeline is where you will trim and arrange clips into a complete video.
The Index button on the left side of the timeline has tools for keeping your projects organized. You can search your clips, tags, and roles here and see the names. position of clips in the timeline and notes for the clips.
The Timeline Tools represented by the mouse icon generally, contains different tools for editing in the timeline. The Select Tool (A) is the default selection but you can change this tool to decide how to affect your clips.
Part 6: Effects and Transitions Browser
The Effects and Transitions is located on the bottom right side of Final Cut Pro and will house all built in Mac templates as well as any installed Effects and Transitions.
You can apply effects and transitions directly onto your Clips, Titles, and Generators by dragging them from the browser onto your clips in the project timeline.